How to Bulk Import Social Media Posts From a Spreadsheet
Bulk import social media posts from Excel, Google Sheets or CSV: set up the columns, dates and accounts, check the preview and schedule up to 100 posts at once.
SchedulifyX is the AI-powered social media command center built for creators, businesses, and agencies. Schedule posts across 10+ platforms, generate content with 9 specialized AI agents, collaborate with your team using approval workflows, analyze performance with deep analytics, and manage all social engagement from a unified inbox. Trusted by professionals worldwide — free plan available, paid plans from
Scheduling a month of social media posts one at a time means opening the composer, pasting a caption, picking accounts and setting a time, again and again. Planning the month in a spreadsheet and importing it in one go is faster, and it keeps the whole plan in one place where colleagues can review it before anything is scheduled. This guide explains how to bulk import posts from a spreadsheet into SchedulifyX: what the file needs to contain, how to import and review it, and how to avoid the problems that most often stop a row from importing.
Before you start
What you need before you start
Bulk import reads a file you prepare in any spreadsheet app. Before you build one, check three things, because each of them stops an import if it is missing.
A .csv or .xlsx file
Excel saves .xlsx directly. In Google Sheets use File, then Download, and pick Microsoft Excel or CSV. In Numbers use File, then Export To. There is no live connection to a spreadsheet, so you upload a file each time.
Connected accounts
Every account you want to post to must already be connected to the brand you are importing into. A row that names an account SchedulifyX cannot find falls back to other rules or fails, as explained below.
The right plan and role
Bulk import is part of the Creator plan and every plan above it; the Free plan does not include it. You also need permission to create posts in the brand, or the Bulk Import button does not appear.
Imported posts count towards your plan's monthly post allowance in the same way as posts you create in the composer, so a large import uses that allowance up just as quickly.
Templates
Start from a template
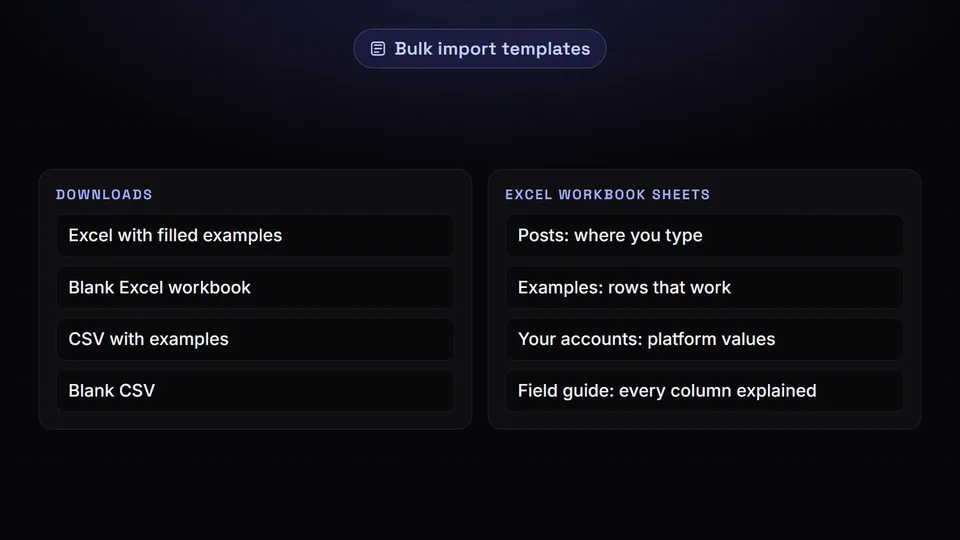
The quickest way to a file that imports cleanly is to start from one of the templates in the Bulk Import window. There are four downloads: an Excel workbook filled with example posts, a blank Excel workbook, a CSV with examples and a blank CSV. A Field guide button next to them explains every column.
The Excel workbook is the better choice for most teams. It has four sheets: Posts, where you type; Examples, which shows rows that work; Your accounts, which lists every connected account with the exact name and platform value to type; and Field guide, which explains each column and the values it accepts. It also carries the extra columns for platform-specific settings, and keeps line breaks in captions without any quoting.
Pro Tip: Download the template from inside the brand you plan to import into. The Your accounts sheet is built from that brand's connected accounts, so the names and platform values it lists are the ones the import will accept.
Columns
Set up your spreadsheet
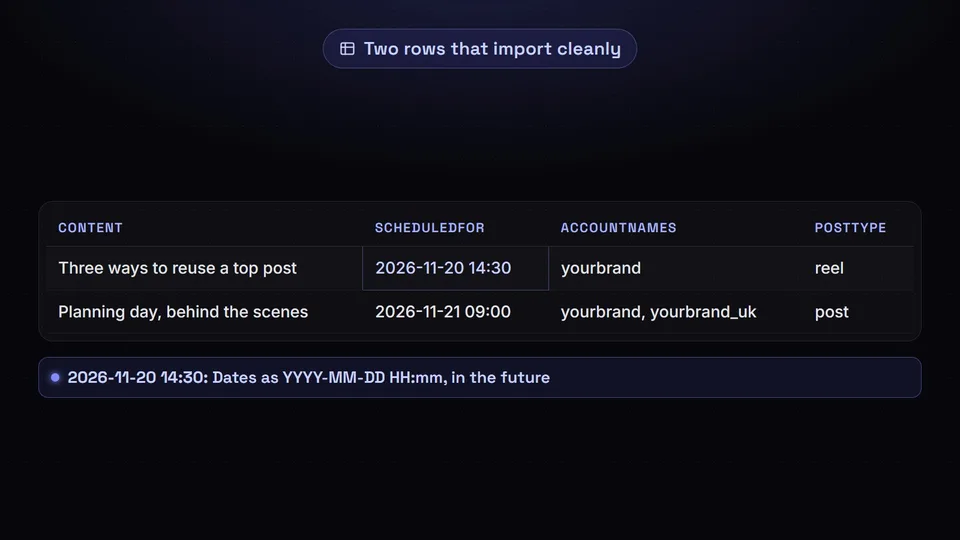
Use one row per post and one header row at the top. The import reads columns by their header name, so the names must match exactly, although capital letters do not matter, the order of the columns does not matter and any extra columns you add for your own notes are ignored. Only two columns are required.
| Column | Required | What to put in it |
|---|---|---|
| content | ✔ | The caption, exactly as it should be published. |
| scheduledFor | ✔ | The date and time, written as YYYY-MM-DD HH:mm, for example 2026-11-20 14:30. It must be in the future. |
| accountNames | This or platforms | The accounts to post to, by name or @username, separated by commas. The @ is optional. |
| platforms | This or accountNames | Platform values from the Your accounts sheet, such as instagram, separated by commas. On its own, only for a network where you have one account. |
| postType | ✗ | post, reel, story or video. |
| linkAttachment | ✗ | A link to attach to the post. |
| mediaUrl | ✗ | One public link to an image or video file. |
The Excel template adds columns for settings that only some platforms use: trialReel, graduationStrategy and coverSeconds for Instagram reels, privacy for TikTok and boardName for Pinterest. Its Field guide sheet lists the values each one accepts.
Dates and times
Write every date as YYYY-MM-DD HH:mm. The time is read in the time zone of the computer you import from, so if your team plans in one time zone and imports from another, set the computer to the planning time zone first or check the scheduled times in the post list afterwards. Rows with a date in the past are rejected, and the preview has a button to move them forward, described below.
Choosing accounts
The accountNames column is the precise way to send a post to specific accounts. Type each account's name or its @username, separated by commas when a post goes to several; capital letters do not matter and the @ is optional. Every name in the row must match a connected account, or the row is flagged before you import. If you fill in platforms as well, only accounts on those networks count, which helps when the same handle exists on two networks.
The platforms column on its own works for any network where the brand has exactly one account. Where it has several, for example two Instagram accounts, a row with platforms alone is flagged and tells you which accounts exist, because SchedulifyX will not choose one for you. If both columns are empty, the row is not imported.
Media
Each row can carry one image or video through the mediaUrl column. When you import, SchedulifyX downloads the file from that link and attaches it to the post, so the link must be public and must point at the file itself rather than at a page that displays it. If the file cannot be downloaded, or the link opens a page instead of an image or video, that row is not imported and the result tells you why, so a post never goes out without the media it was meant to carry. Open every link in a private browser window before you import. For posts with several images, import the post with one and add the others in the composer.
Plan the month in one sitting
Download the Excel template from the Bulk Import window, fill in a week of posts and import them in one go.
Open SchedulifyX →Step by step
How to bulk import posts from a spreadsheet
With the file ready, the import itself takes a few minutes.
Prepare your file
Fill in one row per post with at least content and scheduledFor, add accountNames for every row, and save the file as .xlsx or .csv. Keep each file to 100 posts or fewer.
Open Manage Posts
In the sidebar, under Content, choose Manage Posts, then click Bulk Import. The Bulk Import Posts window opens.
Choose your file
Drag the file onto the upload area, or click it and select the file. An Excel workbook is read on the server, which takes a moment; a CSV is read straight away.
Review and fix the rows
Check the preview, correct anything flagged in the Fix rows tab, remove rows you do not want and shift past dates forward if you need to.
Import
Click the Import button, which shows how many posts will be created. The posts are scheduled for the times in your file, or wait for approval if your brand requires it.
Pro Tip: While any row is flagged, the Import button reads "Fix N rows to import" and stays off. Fix each flagged row in the Fix rows tab or remove it, and the button turns on.
Review
Review the preview before you import
The preview is where an import goes right or wrong, and it is worth a few minutes. It has three tabs, each suited to a different job.
- Preview shows each post the way the composer would, with the same platform checks, so you can spot a caption that is too long or a post type a platform will not accept.
- Fix rows lets you edit any row in place, remove a row you do not want, and shift past dates forward in one step, which saves going back to the spreadsheet for small corrections.
- Rows is a plain list of everything in the file, useful for a final read-through of captions and times.
The preview matches each row to accounts by exactly the rules the import uses, so the accounts you see on a row are the ones it will be posted to. A row whose accounts cannot be worked out says why, right above its preview.
After the import
Check your posts after importing
When every row goes in, the window closes and the new posts appear in Manage Posts and on your calendar, scheduled or waiting for approval. Imported posts are not created as drafts, so check them before their publish times arrive.
If any row is refused, for example because its media link could not be downloaded, the window stays open. It shows how many posts were created and lists each refused row by its row number in your spreadsheet, with the reason. Click Fix these rows and import again to bring just those rows back into the editor, correct them and import them, without repeating the rows that already went in.
Troubleshooting
Common problems and how to avoid them
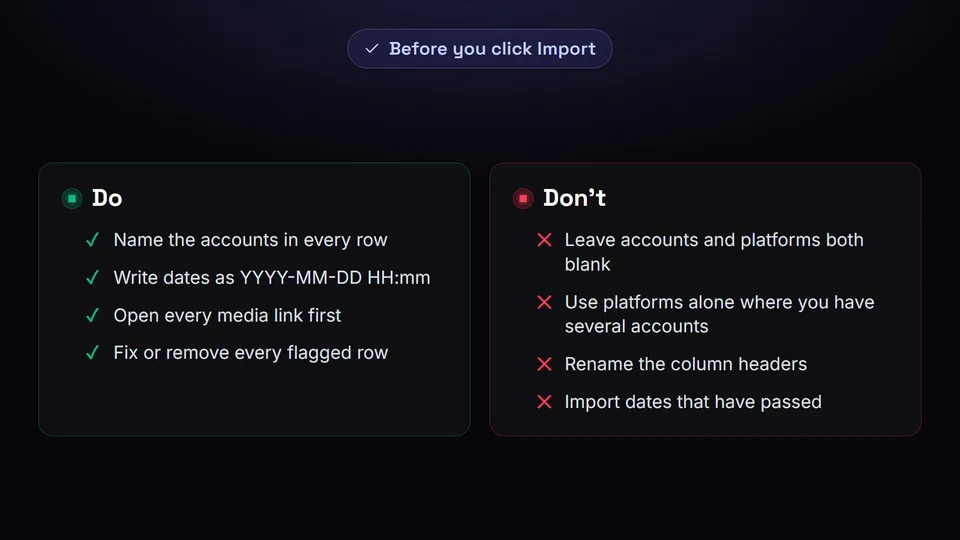
Most failed rows come down to a handful of causes, each with a clear message.
Invalid date format
The date could not be read. Rewrite it as YYYY-MM-DD HH:mm, and in Excel make sure the cell holds a real date or plain text in that format.
Scheduled date must be in the future
The row's time has already passed, often because the plan was written a while ago. Use Shift past dates forward in the preview, or update the dates in the file.
No connected account called "…"
A name in accountNames does not match any connected account. Check the spelling against the Your accounts sheet; a name or an @username both work.
Maximum 100 posts allowed per import
The file has more than 100 posts. Split it into several files, for example one per fortnight, and import them one after another.
Several accounts are connected
The row names a platform where the brand has more than one account, and nothing in accountNames. The message lists the accounts; name the ones the post should go to.
Not available on your current plan
Bulk import needs the Creator plan or above. The Bulk Import window says so as soon as it opens, and the Import button offers an upgrade instead.
Key takeaway
Start from the Excel template, give every row an account name and a future date in YYYY-MM-DD HH:mm format, test your media links, and fix every flag in the preview before you import. Do that and a month of posts takes minutes to schedule.
Next steps
Make bulk import part of your planning
Bulk import works best as the last step of a planning routine rather than a one-off. Many teams plan a fortnight or a month in a shared spreadsheet, agree the captions and dates there, and import once the plan is signed off, which keeps the discussion in one place and the calendar free of half-finished drafts. If your brand uses approvals, imported posts enter the same approval flow as everything else, so a reviewer sees them before they go live.
Keep a copy of each imported file. It is a record of what was planned and when, and the next month's file can start from it. When you are ready, open SchedulifyX, go to Manage Posts and click Bulk Import to schedule your first batch.
Get started free — no credit card required.
